Just in time for the launch of the Digitakt II, DigiChain gets a point update with a few bug fixes and feature updates.
- Added Double selected action to add a copy of a sample to the end of itself for the selected samples.
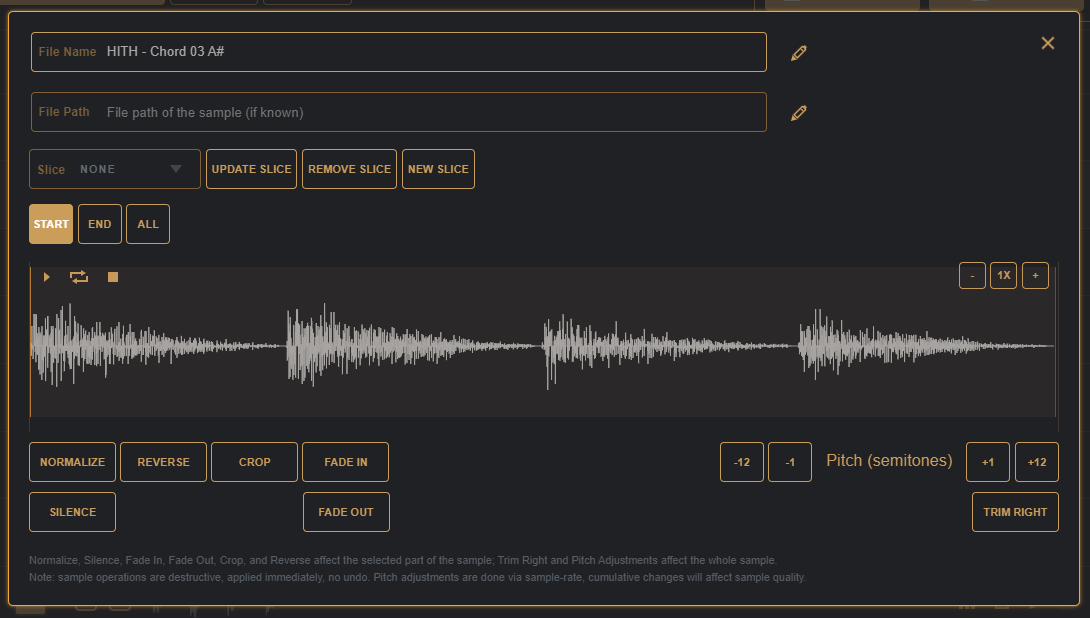
- Prev / Next buttons on the edit panel to navigate between samples without needing to close the edit panel and re-select from the list.
- Cleaned up selected actions list, added overflow so list can scroll on mobile and flex to the width of the panel.
- Shift + Ctrl/Cmd click stretch longest/shortest selected action to set the stretch length in samples instead of seconds.
- Shift + Click on Trim Right button in editor, or selected actions, to also trim silence from the start (left) of the sample.
- Changed the behavior of the grid size buttons, clicking will now set the grid size and keep the selection, to also change the selection is now the shift+click action; This is inverted from other versions, but has been a requested change by several users.
- Shift + L will toggle the lists visibility, useful for simple chaining/conversion if loading a large number of files that can cause the browser dom rendering to slow.
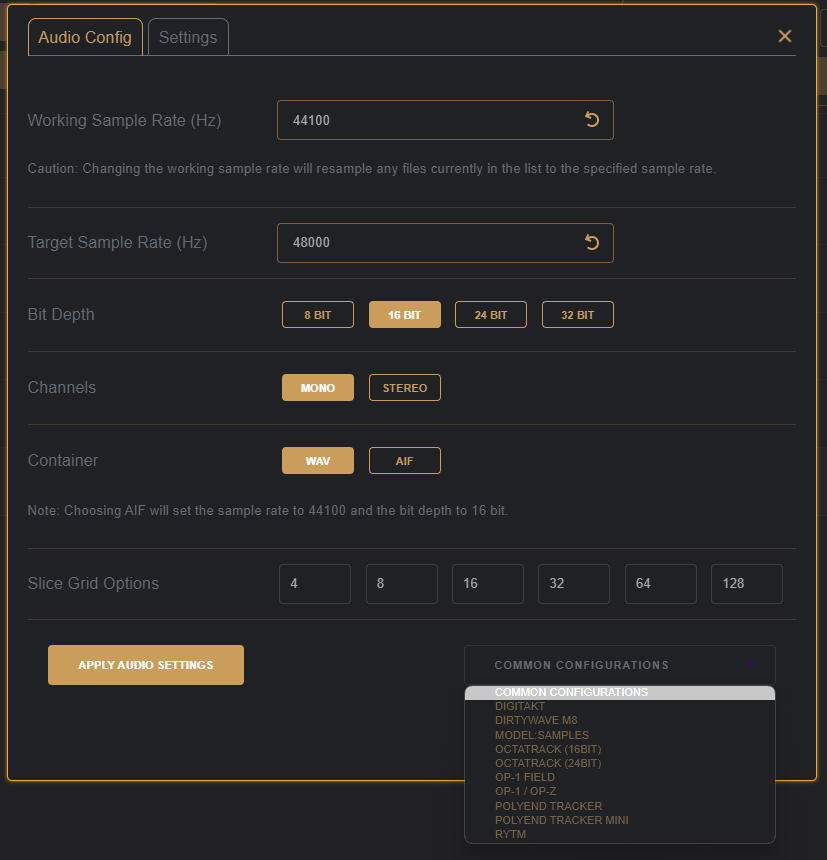
- Hide ‘Create .OT’ button on sample panel if target SR is not 44100.
- Added common configuration for Digitakt II.