When you first open DigiChain, you will be greeted with a welcome screen:
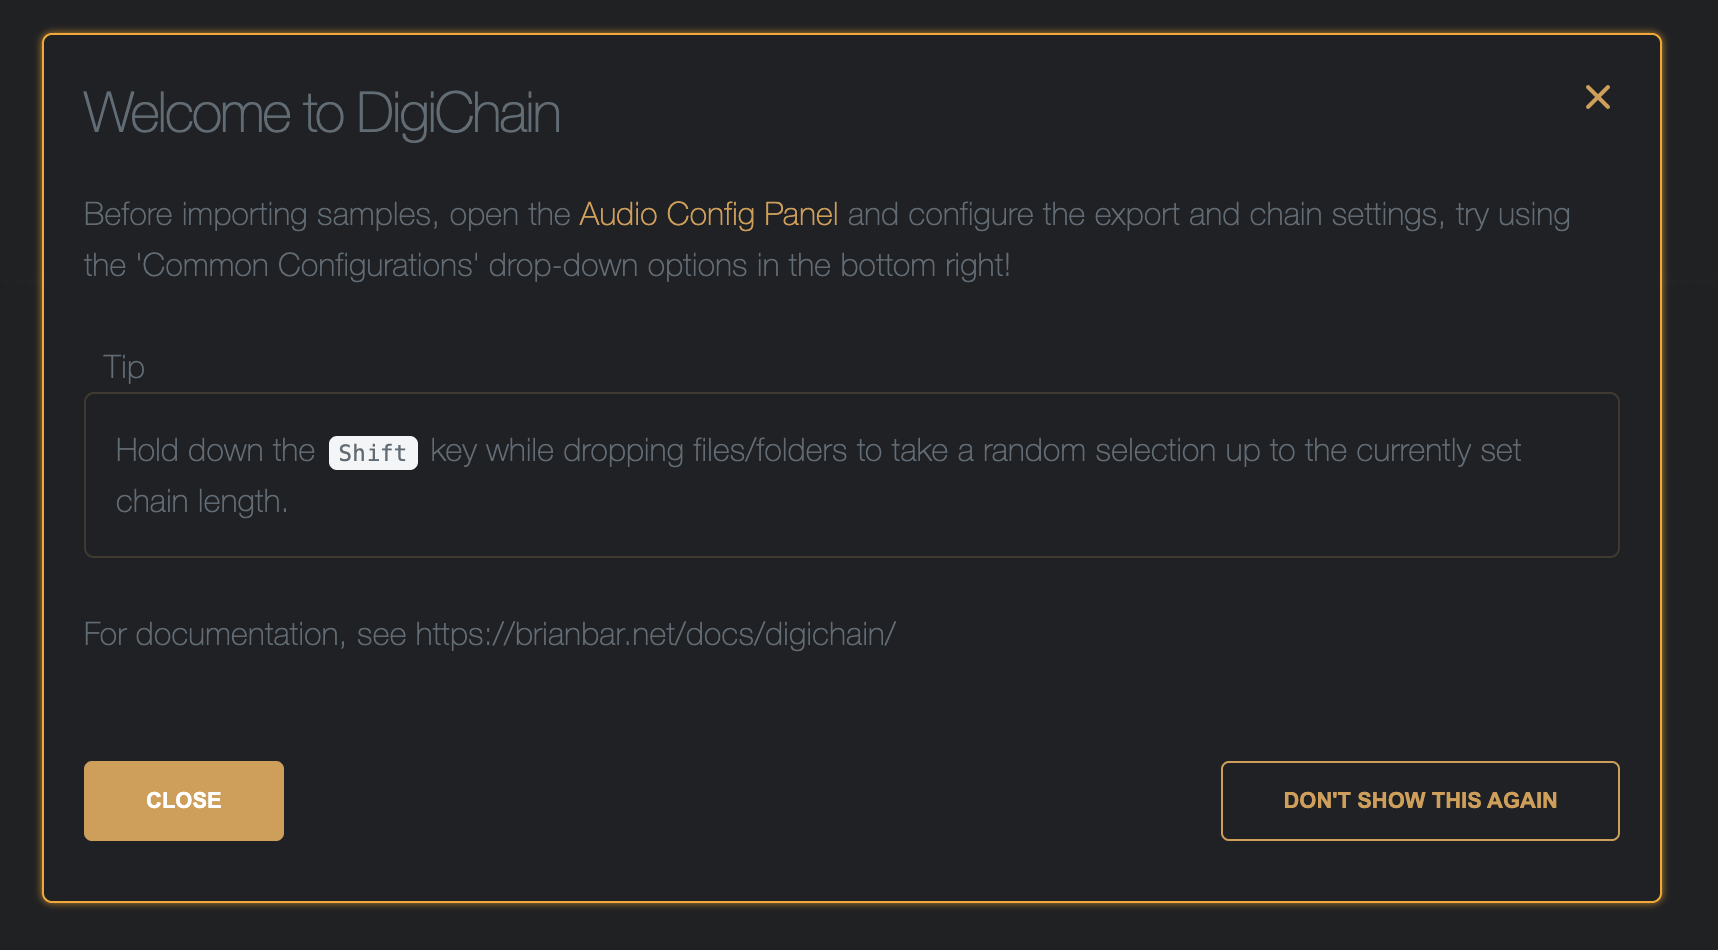
As this screen suggests, its best to open the Audio Config Panel first and choose the appropriate settings for your target output device, there are a selection of common configurations to choose from on the config panel, if your desired device is not listed there and you are not sure what to choose, going for 44100 for the working and target sample rates, 16bit, stereo, and wav file exports is usually a good starting point for most hardware samplers. If you plan to use these samples on device and not do further editing in another sample editor, then dithering can remain set to yes.
Choosing the ‘Digitakt II’ common config for this example.
After applying the config and closing the welcome screen, you will be at the main application screen:
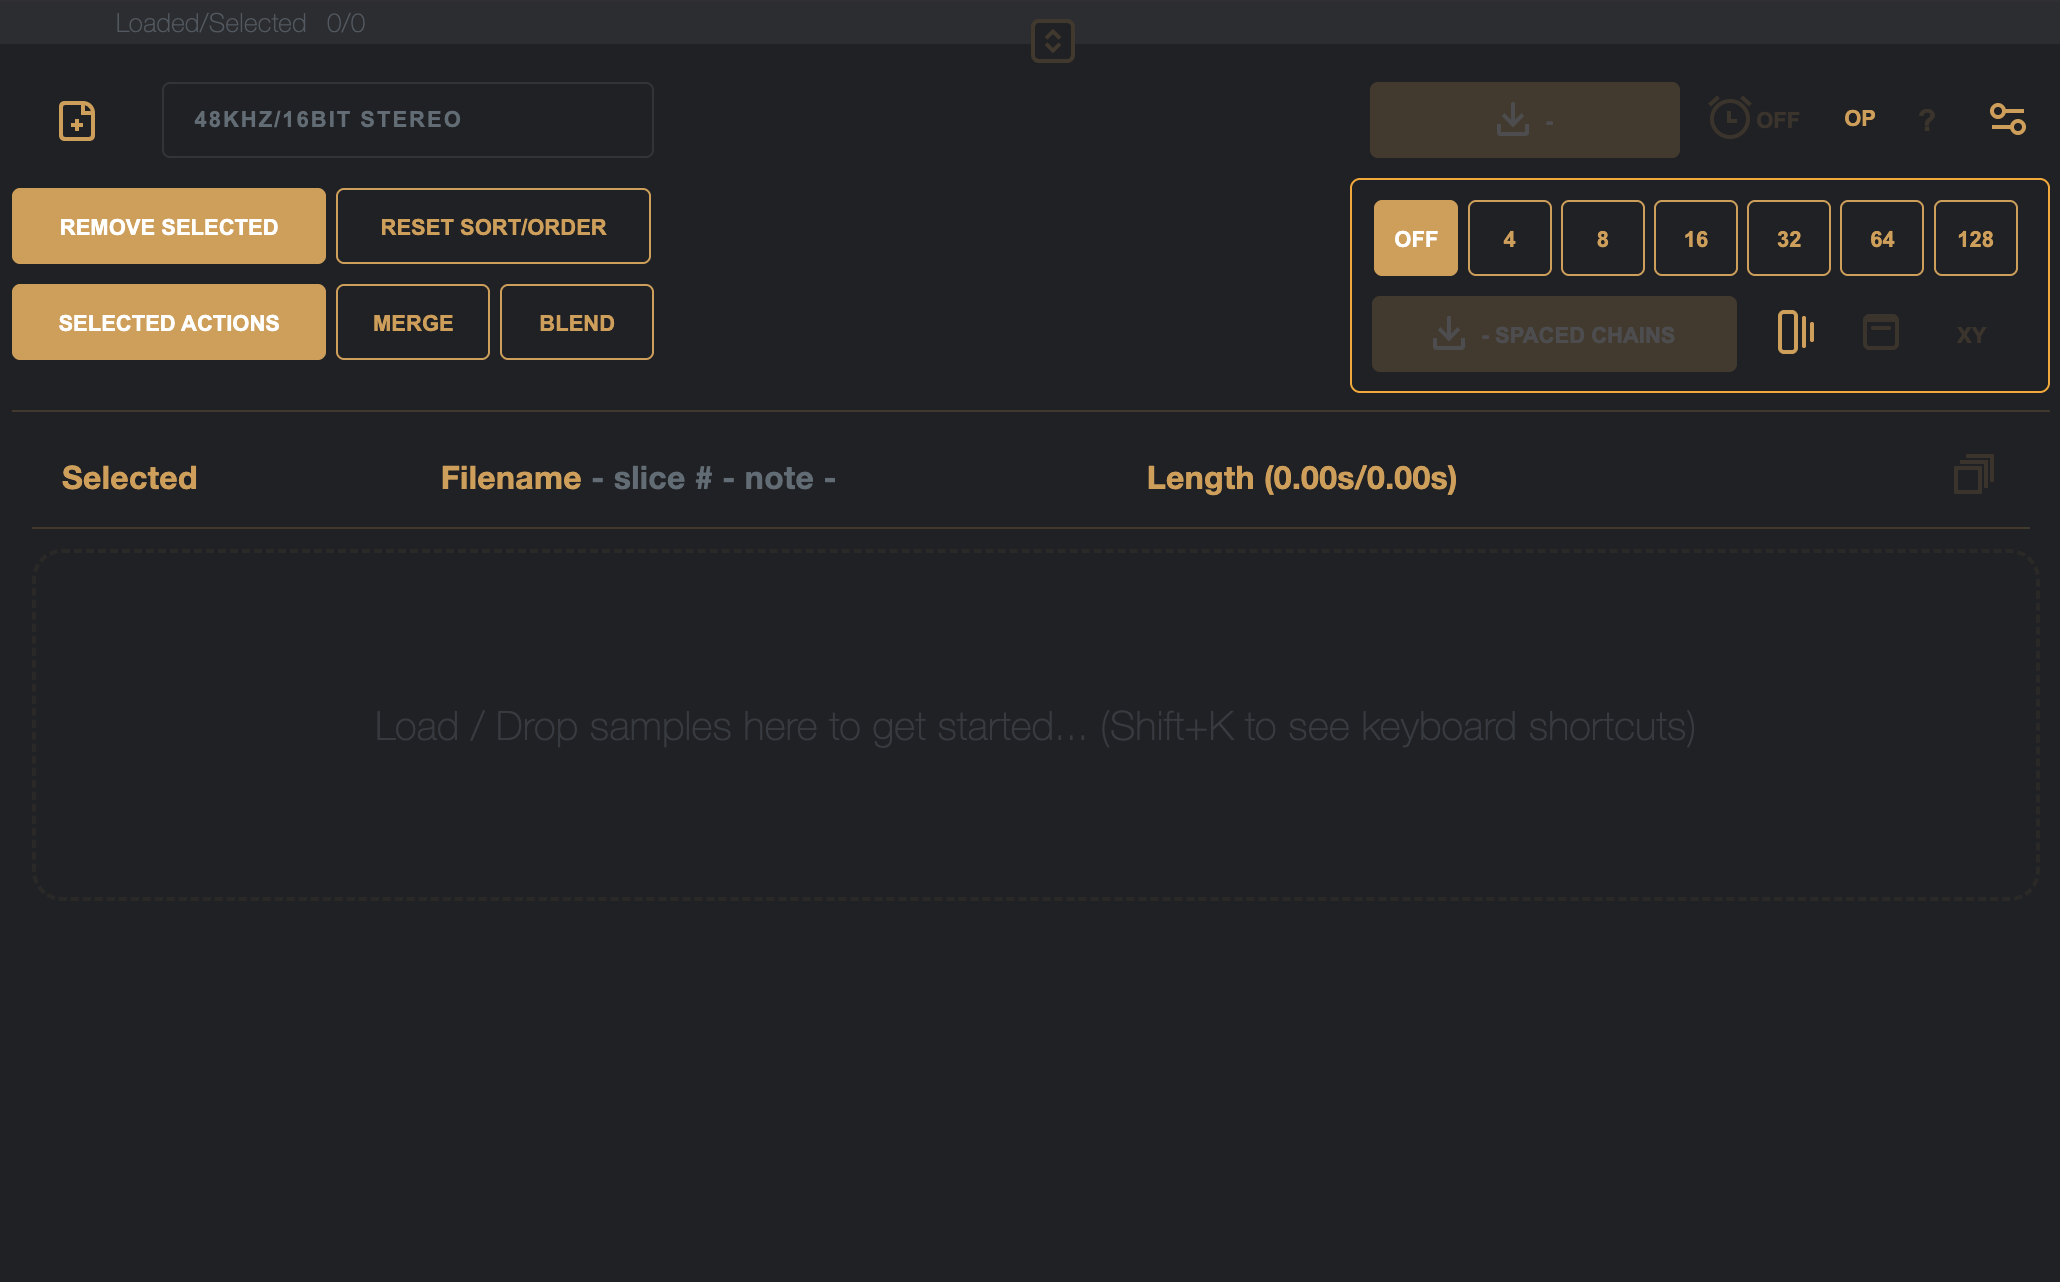
From here, samples can be imported by either using the [+] icon, which will open a file browser to navigate to a folder on the computer to import samples from, or, the preferred method, drag and drop.
From your computers file browser (Explorer on Windows, Finder on macOS), select the files, or folders of files you want to import into the list, and then drag and drop them into the list (or drop-zone if no samples have yet been imported).
Remember, DigiChain process nested folders, so if you drop a folder that contains folders of more samples, all of those items will be processed into the list – if these folders contain zip files, theses zip files will also be opened and their contents processed, including any folder structure within the zip file!
To prevent unexpected large file loads, DigiChain has a soft-limit of 750 files, this can be toggled off in the app settings, but is a good safeguard from trying to load too many samples accidentally.
If you want to get a random selection of samples from a folder – first choose a chain length number from the options available:
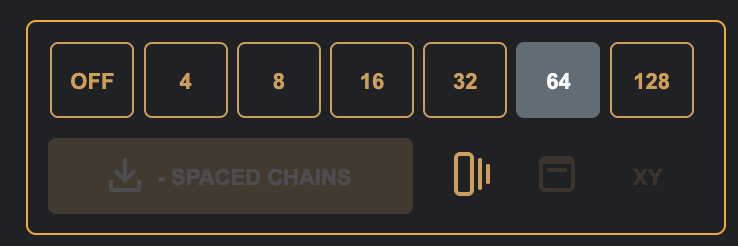
Then, hold the Shift key while dropping your files/folders of samples, in this example, the list will be populated with 64 randomly chosen files.
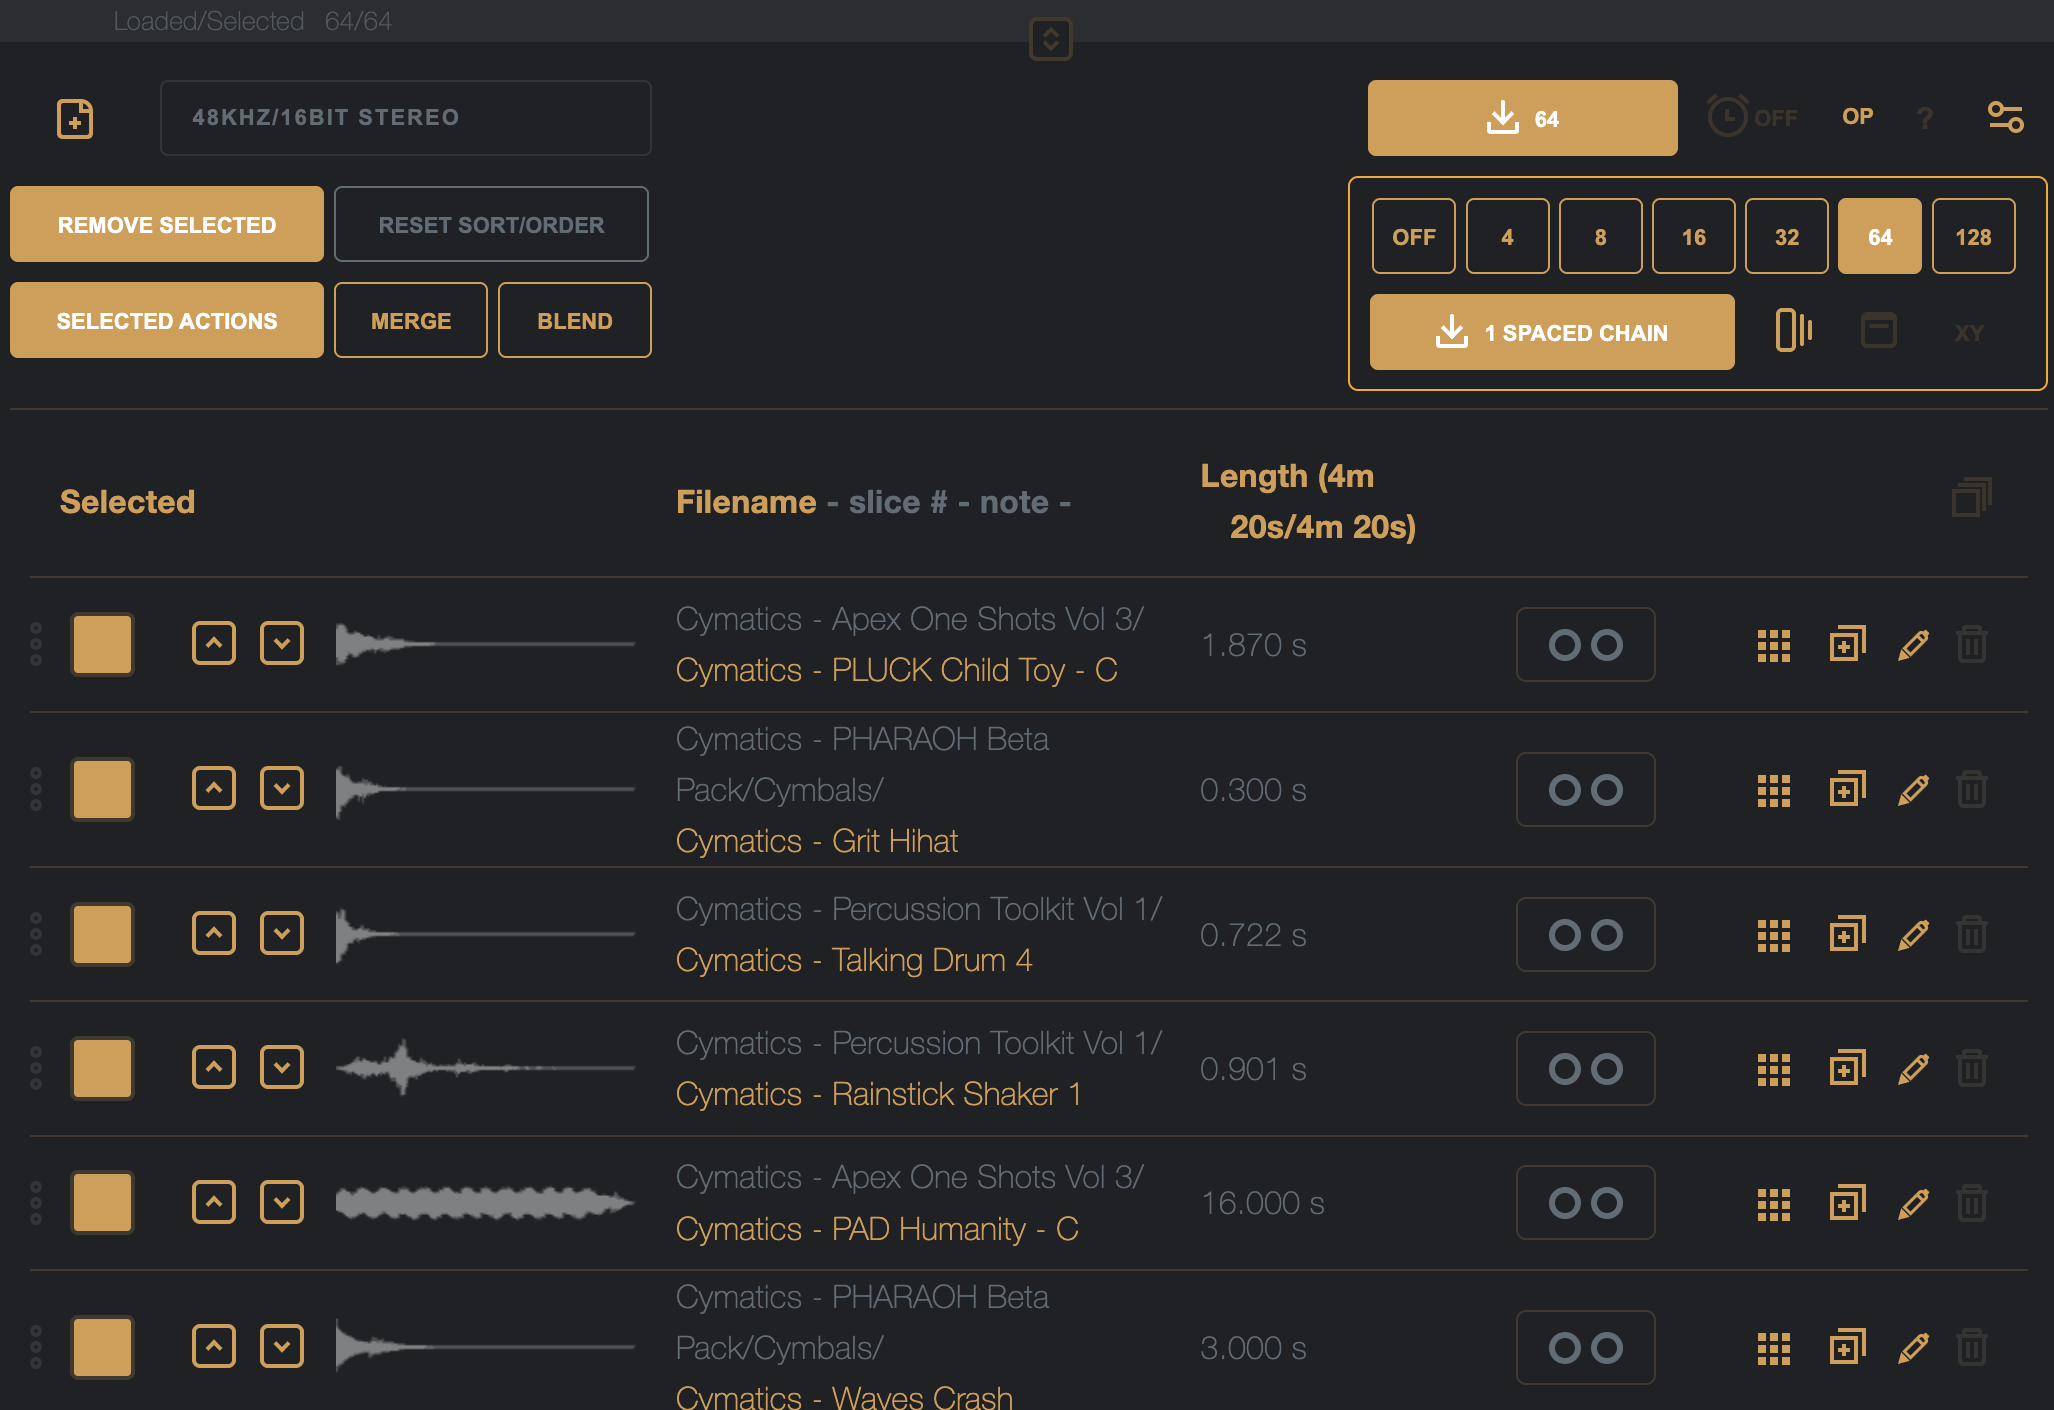
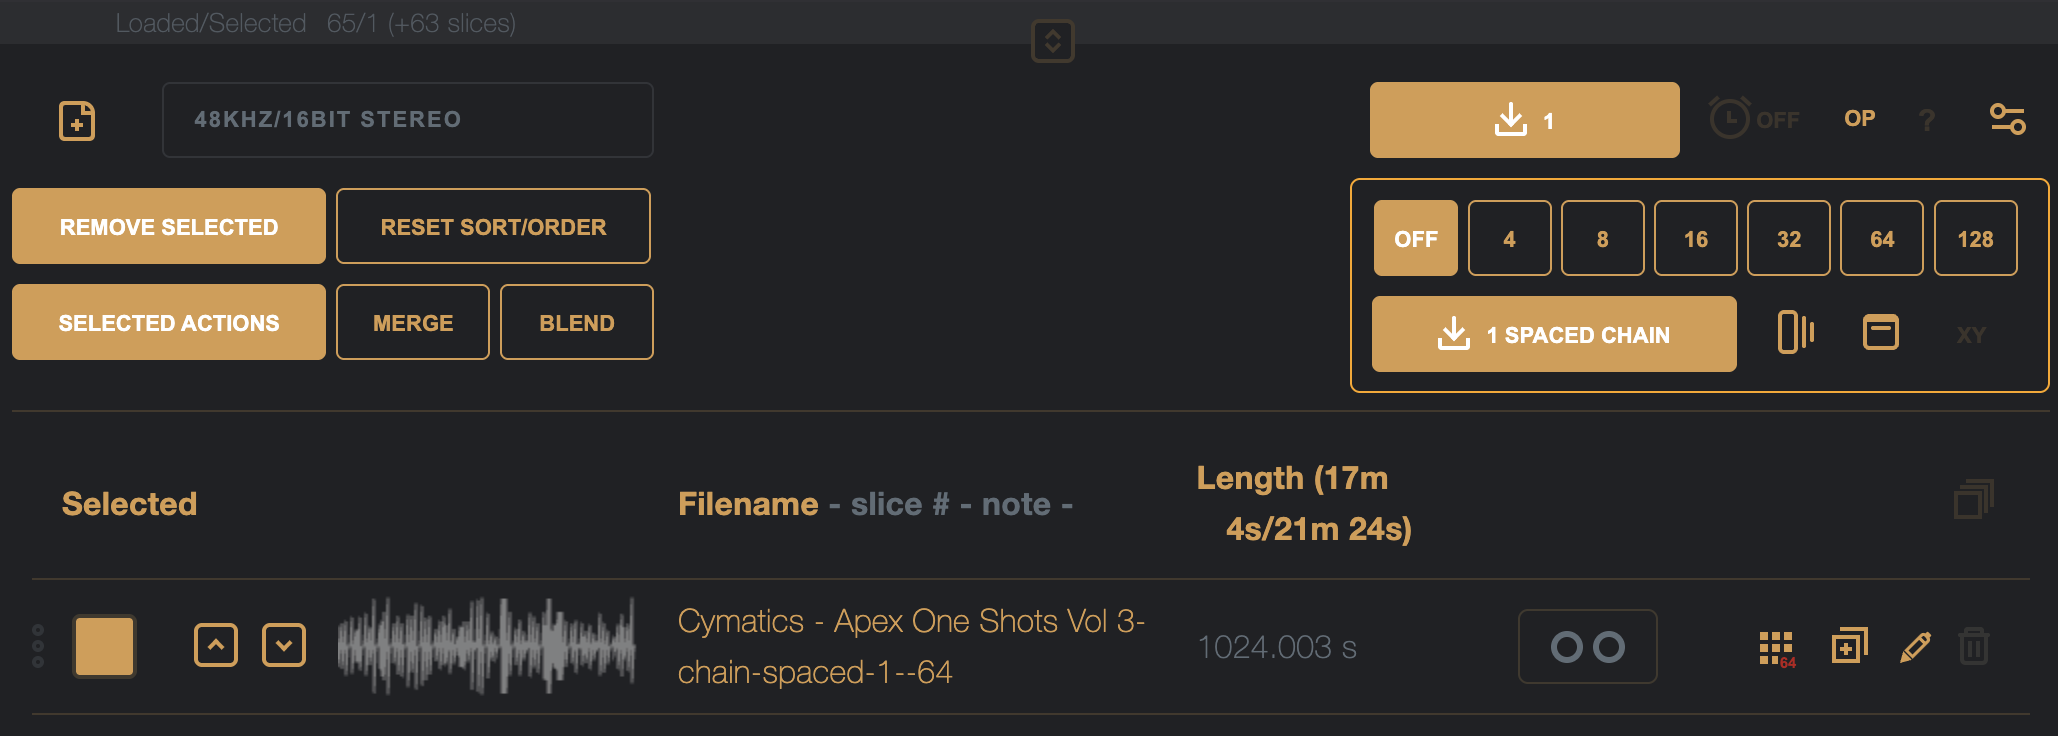
Now there are 64 randomly chosen samples imported into the list:
The three icons in the chain config section perform the following actions:

Spaced chain mode on/of – when on, all samples in the chain will be padded with silence to the length of the longest chain (perfect for the Digitakt / Digitakt II or M8 in grid slicing).

Chains auto-imported back to list – when on, most chains created will be rendered to the top of the list as a new sample; when off, the files will be presented for download inside a zip file.

Xy Prest mode – when on, chains will be output as Teenage Engineering OP-XY drum kit presets inside a downloaded zip file. In this mode, chain lengths are limited to 24 samples (the maximum supported by the XY, and will not be rendered to the top of the list).
DigiChain by default will remember the last session, and prompt to restore it when coming back to the app, refreshing the app shows the following prompt:
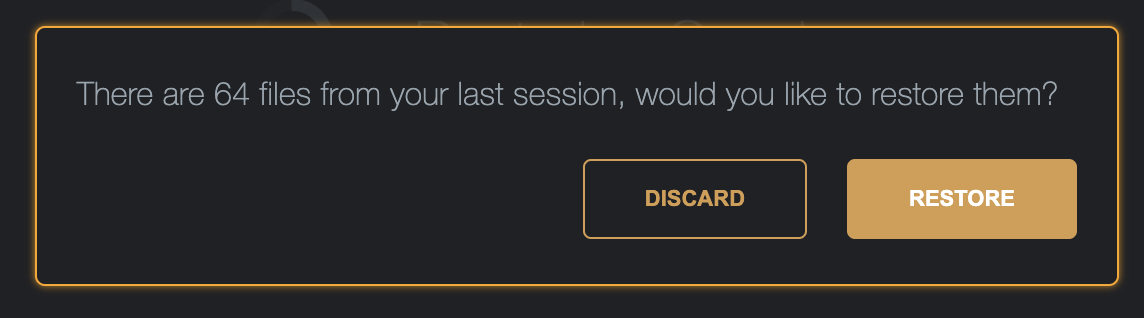
Discard will remove these files from the temporary storage and restore a fresh session, Restore will bring back the files into the list.
Creating a new spaced chain to the top of the list in this example gives a much too large a chain to be useable (17minutes of audio!)
To delete the chain, double-click the trash can icon at the end of the line in the list

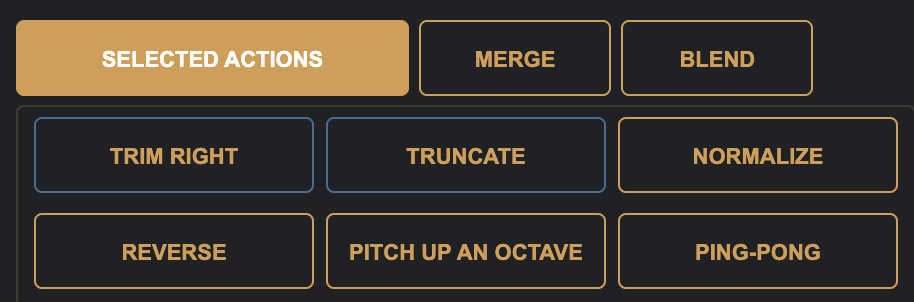
To reduce the length of the samples, we can use the Selected Actions, click the Selected Actions button to expand these options
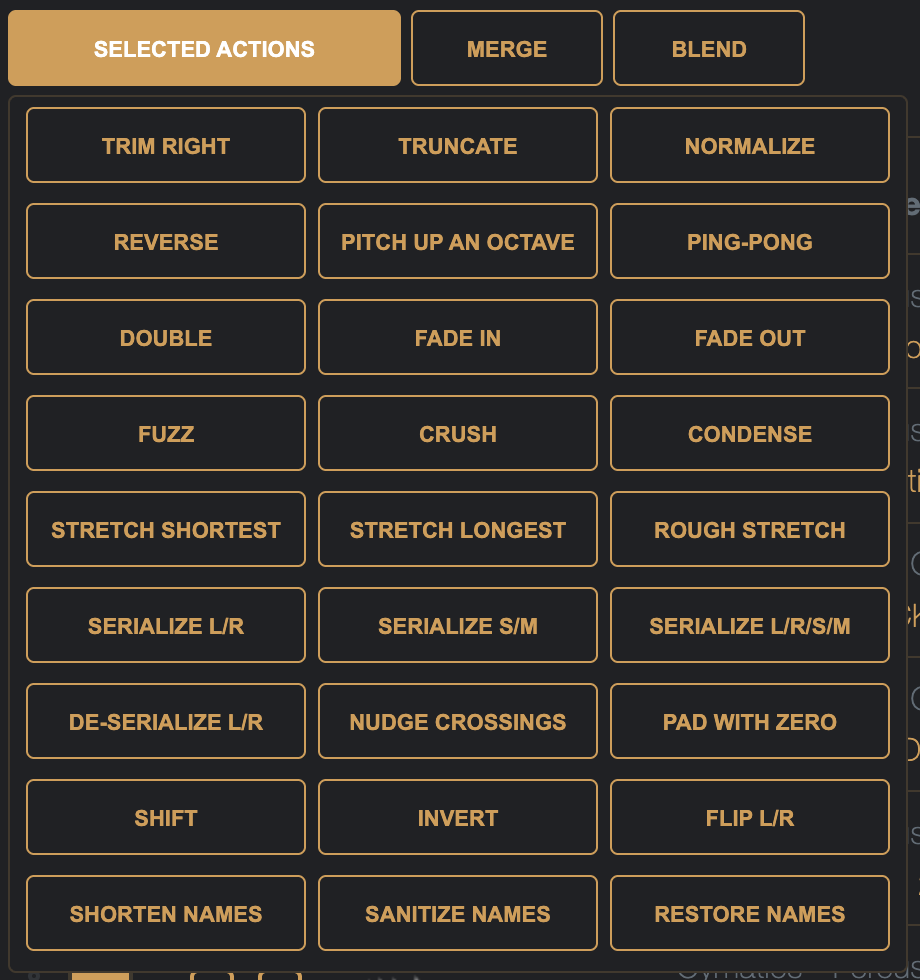
Lets use Trim Right, to remove any silence from the ends of the samples
The brings the list from 4m 20s, down to 3m 40s – still too long ideally for a sample chain for the Digitakt.
Clicking the Length list header will sort the items by their duration, click it until they are sorted largest to smallest.
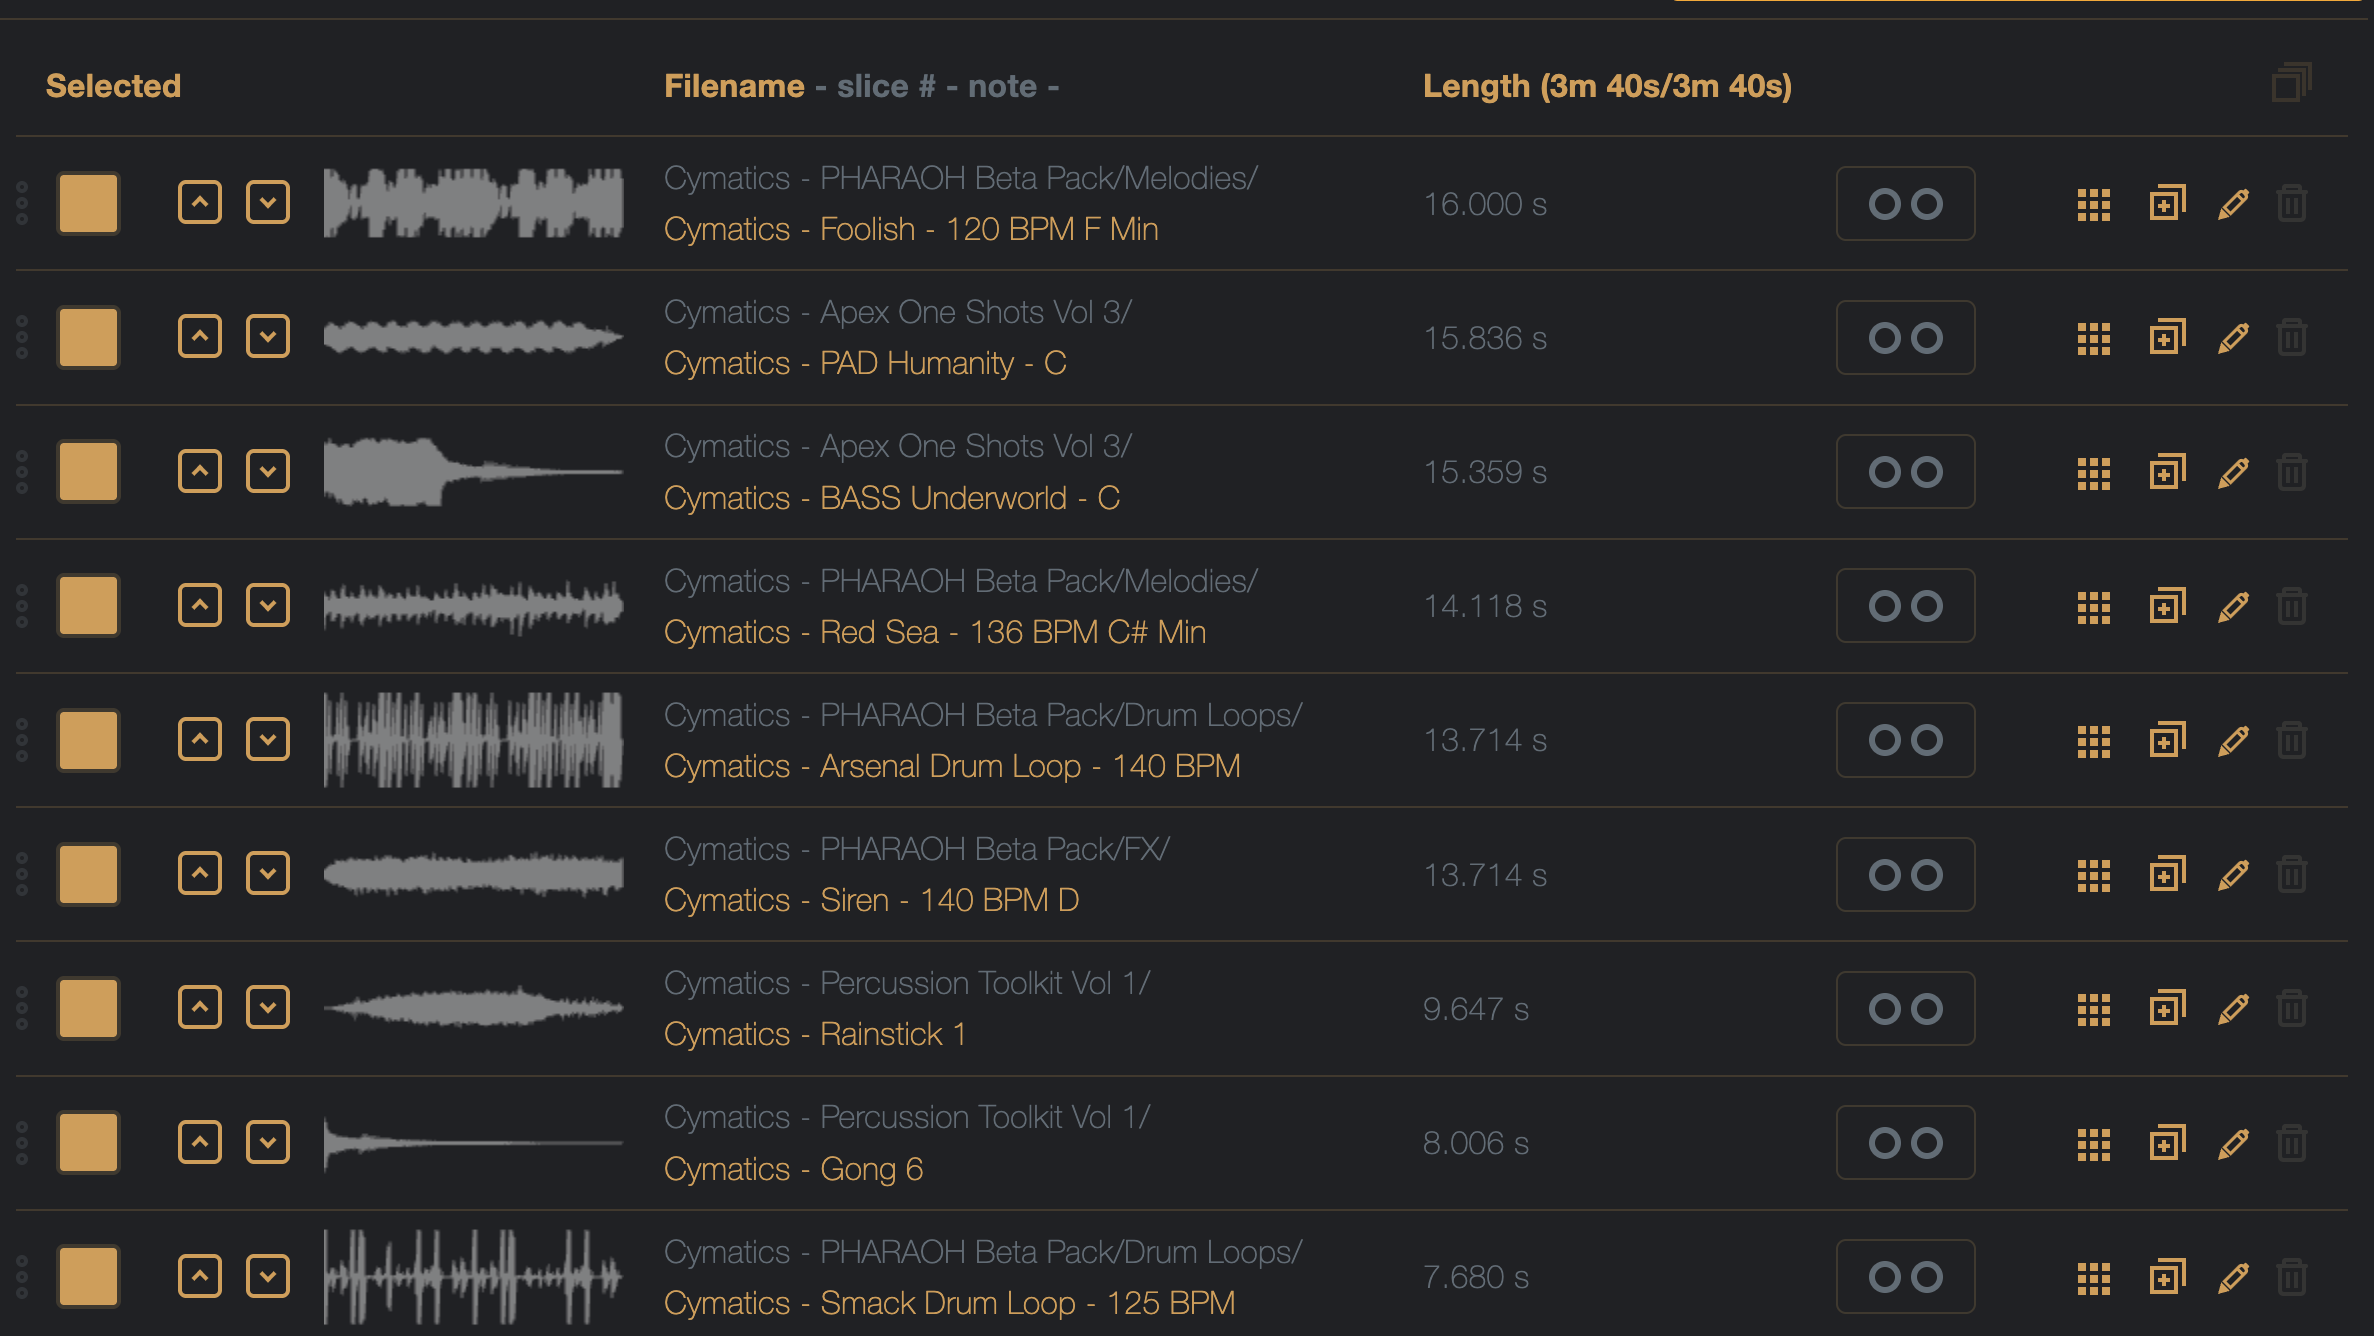
We can see many samples that are long one-shots, or loops – for this chain, I want the samples to be no longer than 3/4s, so, lets hold down the Shift key, and choose the Truncate action
Holding down the Shift key, any button that has a secondary option will highlight blue, (some buttons also have a third action, holding down the Ctrl/Cmd key will highlight these buttons Pink).
The secondary action for Truncate, is to offer a user defined length input prompt
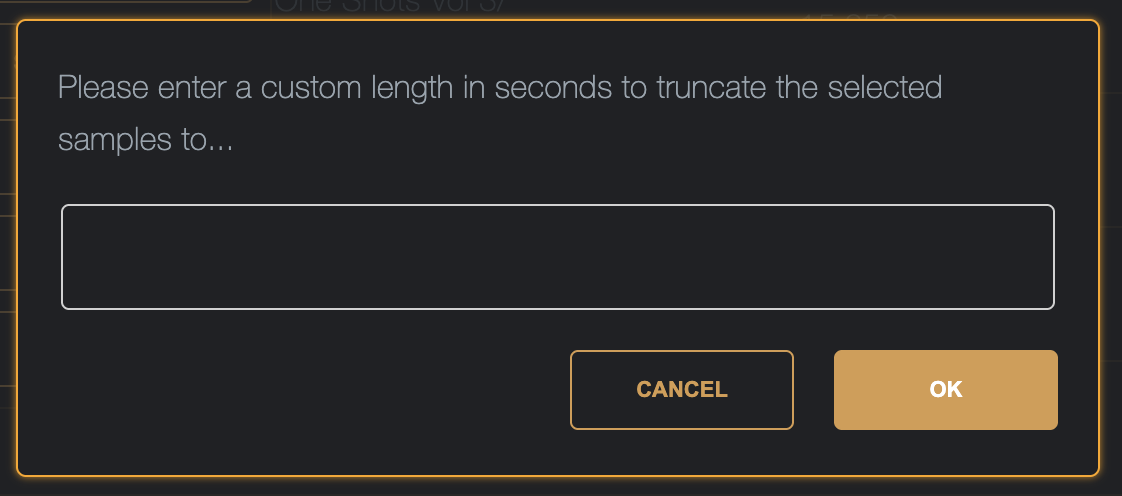
Here, we can enter 0.75 and click the OK button.
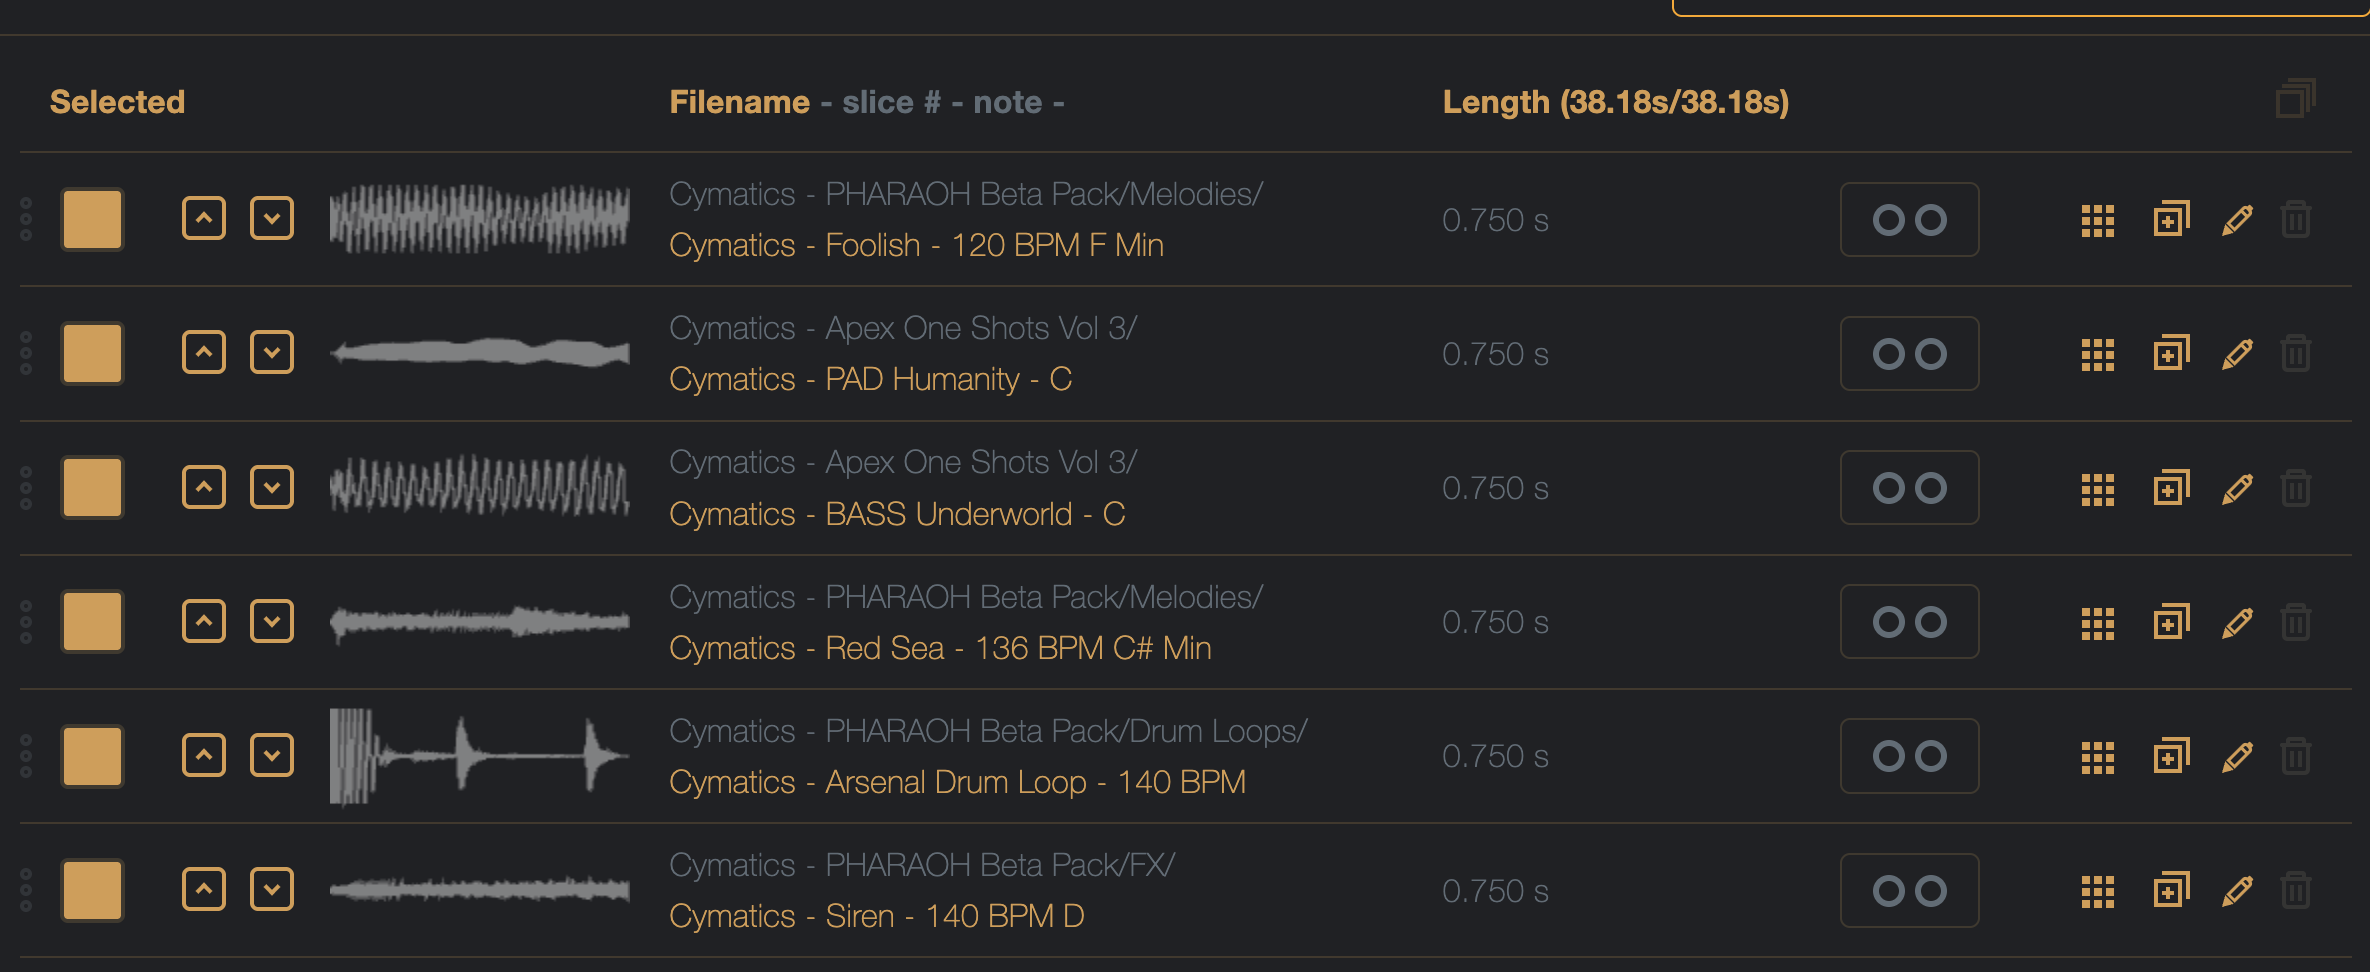
Now, all of the samples are a maximum of .75 seconds in length.
As we truncated the samples arbitrarily, it’s a good idea to add a micro-fade to the nearest zero crossing with the Fade Out selected action to help reduce clicks/pops on slice playback.
The 1 – 0 keys on the keyboard can be used to preview the first 10 selected samples.
Creating the Spaced Chain again gives a much shorted samples chain

This chain is in the order from when sorting by largest to smallest sample size, to fix this, click the ‘Reset Sort/Order’ button to restore the list sorting back to that of file import.
Or, hold down the Shift key while click the ‘Reset Sort/Order’ button to randomize the list order.
If targeting a device that can read wav audio cue slice markers, turning off spaced chain mode and generating the chain, will result in a smaller file size (as each slice does not need to be padded to the same length of the longest sample).
Here we will get a 38.183s length chain instead of the 48s spaced chain.

There are many Selected Actions, remember, most operations in DigiChain are destructive, and there are NO UNDOS!
