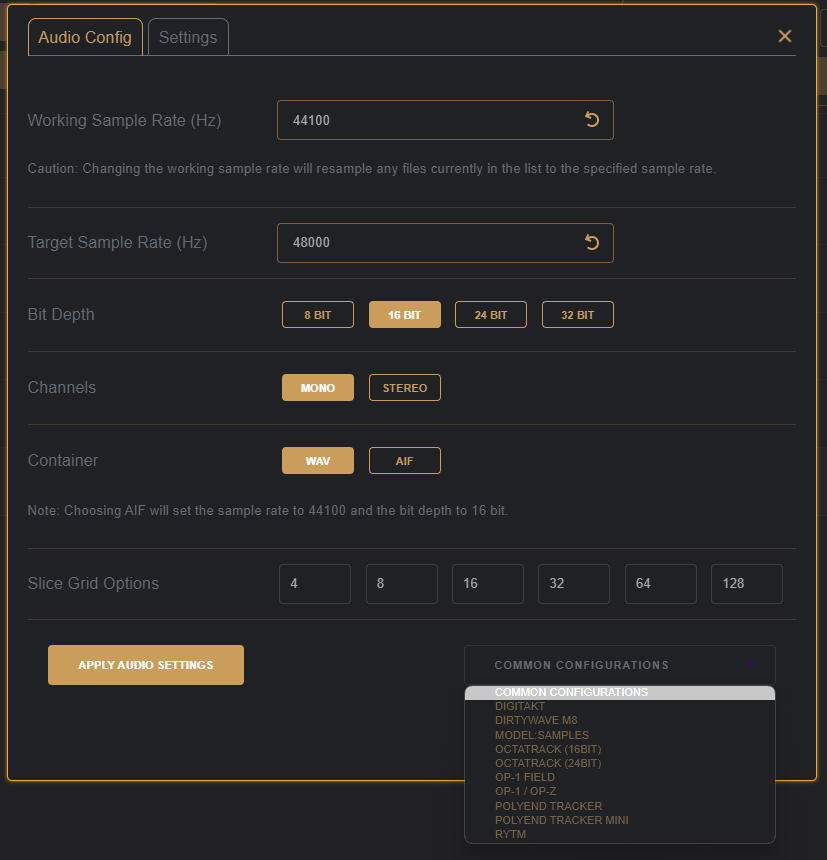
- Support for 24/32bit AIFF file importing.
- Updated note detection to find notes from Logic Pro generated filenames.
- Sorting by note on Logic Pro generated AIFF files now correctly sorts.
- Add !!-s text as the slice count when there is an invalid slice on the file where s is the first encountered invalid slice number.
- Graceful handling of invalid slices when joining, if an invalid slice is encountered, the join will use the full source sample instead.
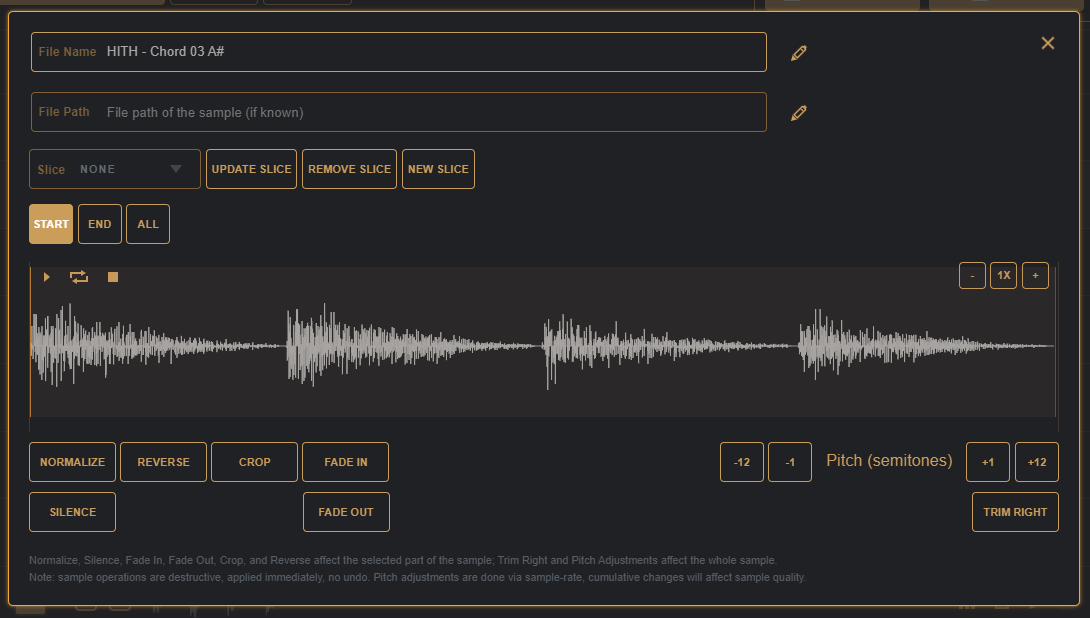
- Added basic pitch detection to the edit panel.
- Use
,and.keys to change the selected slice on the edit panel. - For Stretch Selected Actions holding the Alt Key, and for the pitch shift buttons on the editor panel, holding the Shift+Alt keys will apply time-stretching where the pitch of the samples is preserved.
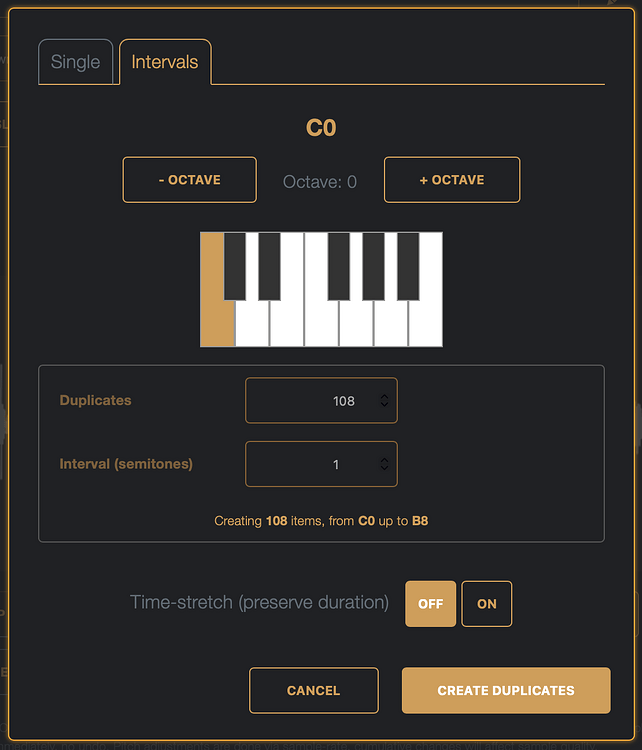
- Repitch tool in sample editor panel with pitched duplicate interval mode.
- Moved the merge and blend buttons into the selected action panel.
- Disable the selected action panel when no samples are selected.
- Allow override/manual set of detected pitch via editor → pitch shift+click, or via toast link if pitch detect failed.
- Record audio from the device microphone function with slice markers added on recording pause; Uses web MediaRecorder API so quality is compressed audio (ogg/vorbis/vp8).
- When the recording function is active, pressing C will add a slice marker into the recording.
- While playback is active in the sample editor panel, pressing C will add a slice marker at the play head.
- Allow resampling as an input recording source.
- Added Amiga Paula processing selected actions (8 or 14 bit) best used for final render of samples as this is a destructive effect.
- Bug fixes:
- Session export files have .dcsd.dcsd as the filename extension in the saved notification text.
- Cue points with differing fmt header resulted in the embedded slices being discarded.
- On sorting inserted blank audio files.
- Where duplicates are numbered from *-2 instead of *-1.
- Sample editor panel would not show the correct play head position when the sample was playing in Safari/WebKit.
Note :: Resampling works a little differently depending on the browser, Safari/Webkit only allows resampling from the current tab, so just from DigiChain itself, Chromium based browsers allow choosing a tab, an app, or the whole screen, just make sure you check the ‘Share Audio’ toggle, otherwise there’s no audio to record! This means there is a slight difference also on the offline desktop builds available from gumroad and itch, as they are built using Rust and Tauri, so macOS gets the Safari limitations and Windows gets Edge (so Chrome). The desktop builds for 1.6.0 are also smaller binaries again as I did some bundle optimizations and have started moving some functionality into Rust for performance reasons, which also gets us smaller binaries ![]()

While recording, tapping the rec button again pauses, and adds a slice when tapping again to continue recording – pressing the C key will also add a slice marker without pausing the recording.
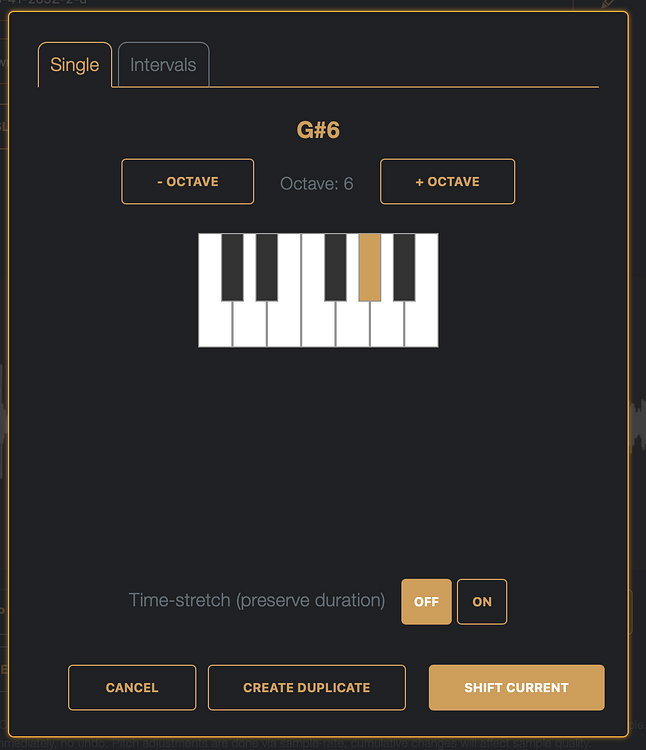
The new Repitch option in the sampled editor allows you to change the pitch of the sample and supports a rudimentary time-stretch.
The Interval tool is mostly what I’ve been using for getting a single sample pitched over a range for use as a chain on my M8 to ease SD card wear.
And a bunch of little things like the lazy chopping in the sample editor while playing, keyboard commands to move through the slices, more than just 16bit AIFF file import support, sorting things. Hopefully others find it as useful as I still do, thanks!